So at this point, you should have a box, which in the cabinetry world is called a “carcass.” How metal is that? Now you’re going to add doors and legs, and turn it a different color if you feel like it.
First up: doors! Inset doors are tricky, especially if you want them to be perfect. They will ideally fit exactly into the opening of the carcass with a 1/16″ gap all around. If your box is perfectly square that would be easy, but it’s not, and it wouldn’t be even if you were a professional box-maker.
There may be a better way to do this–there are certainly more complicated ways involving protractors and stuff–but I just trace the cabinet opening onto a piece of plywood and then cut on the lines.
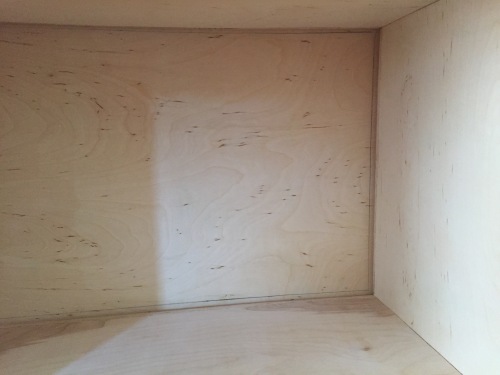
Kinda hard to see, but there they are. (You obviously want to go in from the back of the carcass and hold the plywood up to the front–if you’re building something with a back you definitely have to remember to do this before you put the back on.) Since the front edges are angled it’s a little tricky to trace the opening, especially with a regular pencil. I used a flat carpenters pencil and slide it across the wood, which ensures it doesn’t get angled weird and offsets the line from the opening about 1/8″.

Is this way too confusing? I feel like once you’re doing it it will make sense.
Cut out the rectangle you traced (using your saw guide obvs!) then cut down the center. Yay doors!

Now it’s time to stain the whole thing. The birch plywood might feel pretty smooth but that’s a lie, it’s not. If you apply stain to it in its current state it will look like absolute garbage. I always sand really, really well with 220 grit sandpaper, then follow up with some 400 grit. Do not listen to people who tell you that 220 grit is as fine as you need to go. They are horrible neanderthals who clearly do not have any nerve endings in their fingertips. Protip: do not do an amazing job sanding the carcass and totally forget to sand the doors, then decide “eh, whatever, good enough” when you finally notice. This will result in ugly doors and a ruined evening. (Guess how I know?)
After everything is super silky smooth, apply a coat of wood conditioner. THIS IS NOT OPTIONAL. YOU WILL BE SO SAD IF YOU DON’T. It smells really bad, by the way. Open some windows so you don’t die. After you’ve waited the proper amount of time (~30 minutes) and wiped off the excess, it’s staining time!

Super cheap paintbrushes and cut up towels are my preferred tools for staining. You CAN just use paper towels, but it’s way messier and you have a lot less control that way. Work on one side at a time, and just paint on the stain then wipe it off. How long you let it sit before wiping it off is up to you, but birch doesn’t really suck up stain like pine does so the color you get after a minute is pretty much as dark as it’s going to get. You can do multiple coats if you want it a little darker or more dimensional, but be aware that each coat increases the drying time a lot.
After it’s 100% dry you can do a coat of polyurethane or the top coat of your choice. Whatever you use, make sure that the stain is SUPER SUPER DEFINITELY TOTALLY dry. Otherwise the top coat will mix with the non-dry stain and make super gross drips and pools that are really difficult to fix. I don’t really have any recommendations for top coats because I’m pretty terrible at using all of them. Spray poly is “easy” to use but it’s really difficult to get even coverage over large areas, and brush-on poly is always full of air bubbles no matter what I do. I guess they both have a learning curve that I am all the way at the bottom of. So use whatever you want, prepare to mess up, and love your crappy little box anyway!
Here’s another protip: staining wood is easy, but properly finishing wood is an art. “Farmhouse” style builds are really popular right now, and I think a lot of that has to do with how forgiving the finishing process is on “rustic” pieces, and also the fact that you can get away with using cheap pine boards. Mid-century style furniture, on the other hand, is characterized by simple shapes and minimal detailing, which doesn’t leave a lot of wiggle room for poor finishing or bad wood. Since there’s so little going on visually, any errors tend to be glaring. My advice is to always use the best wood you can afford and to take your time with every step, and most importantly to not fall into a spiral of self-loathing when you can’t get your stuff exactly the way you want it. Art is hard, you guys.
Since we’re already on the subject of the nightmare that is building mid century inspired furniture, let’s talk about hinges. You cannot buy hinges for this project at Home Depot or Lowes or any other big box store. You know all those websites that post building plans drawn in Sketch Up and never, ever a picture of anything that’s actually been built from those plans? Those are the same websites that simply list “hinges” in the materials list, then say “step 13: install the hinges and hang the doors.” Because it’s not like there are eight billion different kinds of hinges out there, and twelve million ways to use them. Yeah, just “install the hinges.” Seriously, fuck those websites. It’s like aspirational DIY squared: for people that would like to be the kind of person that builds a farmhouse table so they can be the kind of person who owns a farmhouse table. The plans are always just detailed enough to make you think “sure, I could totally build that,” but never detailed enough that you could actually build anything, because accurate plans look intimidating and probably don’t perform well on Pinterest.
Alright, rant over. As far as ease of installation and period accuracy, “non-mortise partial wraparound semi-concealed” hinges are what you want. They look like this:


The round part is visible with the door closed, and while you don’t see that on West Elm mid century style pieces, you do see it on actual mid century pieces. For this project I decided to go with totally concealed spring hinges. THIS WAS A MISTAKE. (And, incidentally, why it is taking me so freaking long to get these posts up this week.) Possibly it’s just the particular hinges I ordered, but the spring is tensioned so when it’s closed, the hinge is at closer to 70º and it pulls the door inside of the cabinet. Like so:

They are also ridiculously difficult to install because of this, and they don’t play well with the beveled face on the cabinet. They’re just basically all-around the worst and after wasting a few hours trying to get them to work, I’ve given up.
So definitely get the hinges I linked up there. They are SO EASY. The angled part wraps around the edge of the door, and the flat part screws into the side of the cabinet. It’s a two person job to get everything aligned–one person to hold the door in place and one person to mark the holes on the side of the cabinet but after that it takes two seconds to finish everything. If you’re using 1/2″ plywood, just use little scraps of your 1/4″ MDF to increase the depth of your door to fit in the angled part of the hinge (this picture is from another project):

and a scrap on the inside of the cabinet to make sure the screws don’t poke out through the outside. (Or you could just get shorter screws but who has time for that?) –UPDATE: you should actually just buy shorter screws. I just “borrowed” some hinges from another cabinet and using a scrap piece inside doesn’t really work. I just ordered these–I don’t really understand screw sizing but I’m hoping they’ll work.
So right now my cabinet is sitting here door-less while I wait for new hinges to arrive, but in the meantime I’m working on on a super awesome post about angled legs and attempting to remember even a tiny bit of the trigonometry I learned in high school.

It’s about to get pretty real in here, guys.


